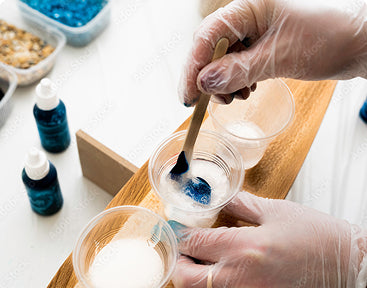
Discover Our Premium Epoxy Resin Kits for Wood Filling

Woodworkers understand the frustration of finding the perfect piece of timber only to discover cracks, knots, or voids that seem to ruin everything. Perhaps you've walked away from beautiful slabs because of natural imperfections, or maybe you've completed projects that look unfinished due to gaps and holes. Epoxy King's advanced filling systems transform these so-called flaws into stunning design features, turning ordinary wood into extraordinary centerpieces that showcase both natural beauty and modern craftsmanship.

Professional woodworkers know that the right filler can make or break a project. Traditional putty products work for small gaps, but they lack the strength and visual appeal needed for statement pieces. Two-part systems offer superior performance, creating fills that are often stronger than the surrounding wood while adding unique aesthetic elements that enhance rather than hide natural characteristics.

Why Professional Woodworkers Choose Two-Part Systems Over Traditional Fillers

Traditional wood fillers serve their purpose in basic applications, but they fall short when projects demand both strength and beauty. Most putty-style products shrink as they cure, leaving depressions that require multiple applications. They also lack the clarity and depth that modern woodworking projects require.

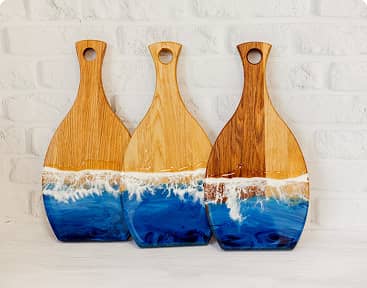
Two-part systems cure through chemical reaction rather than solvent evaporation. This process creates incredibly strong bonds that won't shrink or crack over time. The clarity of these products allows for creative applications like embedding objects, adding colorants, or creating river-like effects that have become increasingly popular in contemporary furniture design.

Waterproof properties set quality systems apart from traditional alternatives. Standard wood fillers absorb moisture, leading to expansion and eventual failure. Professional-grade products remain stable in varying humidity conditions, making them suitable for both indoor and outdoor applications.

Surface preparation becomes less critical with penetrating systems compared to putty applications. While proper preparation always improves results, quality products can bond effectively even to slightly contaminated surfaces. This forgiveness factor saves time and reduces project failures.

Understanding Different Application Techniques for Various Void Types

Small cracks require different approaches than large voids. Capillary action helps thin products penetrate narrow gaps effectively, while thicker formulations work better for substantial holes and missing sections. Understanding these differences ensures optimal results for each situation.

1. Deep voids: Often require multiple pours. Filling large spaces in one go can cause heat buildup, trapped air, and incomplete curing. Staged layers cure more reliably and prevent common mistakes.


2. Edge voids: Present difficulties because there’s no natural backing. Temporary dams made with tape or clamps stop the product from leaking out. Many woodworkers build these areas gradually rather than attempting a single pour.

3. Live edge slabs: Frequently contain bark inclusions or soft spots that must be removed before filling. Once cleaned, the contrast between clear resin and solid wood highlights the natural edge. Proper preparation ensures strong adhesion and long-term durability.

What Makes Some Products Better for Artistic Applications?

Clarity becomes paramount when creating decorative fills that showcase embedded objects or colored effects. UV-stable formulations prevent yellowing that can ruin carefully planned color schemes. Not all products offer the same level of clarity, and price often reflects these quality differences.

Working time varies significantly between formulations. Quick-setting products limit creative possibilities but work well for simple fills. Slower-curing systems allow for complex layering, color gradients, and precise object placement. Understanding these timing differences helps match products to project requirements.

Viscosity affects how products flow and fill complex shapes. Thin products penetrate better but may not stay where placed on vertical surfaces. Thicker formulations remain in place but might not fill narrow spaces completely. Some manufacturers offer multiple viscosity options for different applications.

Color compatibility varies between brands and formulations. Some products accept alcohol-based dyes readily, while others work better with specific colorant types. Testing compatibility prevents expensive mistakes and ensures predictable results across different project elements.

How Do Environmental Conditions Affect Filling Success?

Temperature significantly impacts both working time and final quality. Cold conditions extend working time but may prevent complete curing in reasonable timeframes. Excessive heat accelerates curing so rapidly that proper application becomes difficult or impossible.

Humidity affects different products in various ways. Some benefit from moderate moisture levels for optimal curing, while others require dry conditions. Understanding these requirements helps plan work schedules around weather conditions for outdoor workspace situations.

Dust contamination can ruin otherwise perfect fills. Even microscopic particles create visible flaws in clear applications. Proper workspace preparation and timing fills to avoid dusty conditions improves results significantly. Cover partially cured fills to prevent contamination during vulnerable curing phases.

Air movement accelerates solvent evaporation in products that rely on this mechanism for curing. While most professional systems cure through chemical reaction, some still release solvents that affect working characteristics. Controlling air movement helps maintain consistent working conditions.

Workshop lighting affects color perception during mixing and application. Natural light provides the most accurate color representation, but controlled LED lighting offers consistency. Avoid fluorescent lighting when making color-critical decisions, as it can skew perception significantly.

Essential Tools and Techniques for Professional Results

Mixing ratios must be precise for optimal curing and performance. Digital scales provide more accuracy than volume measurements, especially for small batches. Even slight deviations from specified ratios can affect strength, cure time, and final appearance.

Mixing technique influences final quality more than many realize. Scraping container sides and bottom ensures complete ratio compliance. Inadequate mixing leaves soft spots and streaks that become visible in finished projects. Some products require specific mixing patterns to achieve homogeneous blends.

Application tools vary depending on project requirements. Syringes work well for narrow cracks and precise placement. Spreaders help achieve smooth surfaces on larger fills. Brushes can texture surfaces or blend multiple colors within single applications.

Vacuum chambers remove air bubbles that create weak spots and visual flaws. While professional equipment produces best results, simple vacuum bags can improve amateur applications significantly. Pressure pots offer alternative bubble elimination methods for some applications.

Heat guns help remove stubborn air bubbles and can accelerate curing in cold conditions. However, excessive heat causes rapid curing that prevents proper flow and leveling. Learning to balance heat application takes practice but dramatically improves results.

Timing Considerations for Multi-Step Projects

Complex projects often require multiple product applications at different stages. Understanding how products interact when applied in layers prevents adhesion problems and visual flaws. Some combinations work seamlessly, while others require surface preparation between applications.

Sanding timing affects both efficiency and quality. Sanding too early damages partially cured material, while waiting too long makes material difficult to shape. Most products have optimal sanding windows that balance workability with time efficiency.

Temperature cycles during curing can affect final properties. Rapid temperature changes create stress that may cause cracking or adhesion failure. Gradual temperature transitions allow products to accommodate thermal expansion without damage.

Finishing schedules must account for continued curing in many products. While surfaces may feel hard within hours, full cure often takes days or weeks. Applying finishes too early can cause adhesion problems or create soft spots under surface films.

Project planning should include buffer time for unexpected delays. Environmental conditions, mixing errors, or contamination can require starting over. Building flexibility into schedules prevents rushed work that compromises quality.

Advanced Techniques for Complex Void Patterns

River table effects require careful planning and execution to achieve professional results. Creating smooth, flowing lines while maintaining proper depth control challenges even experienced woodworkers. Templates and guides help achieve consistent results across complex patterns.

Stepped filling creates dramatic depth effects in thick slabs. Each layer must cure completely before adding the next to prevent soft spots and poor adhesion. Color gradients work particularly well with this technique, creating sunset or ocean-like effects.

Embedded objects require careful consideration of expansion coefficients and cure shrinkage. Incompatible materials may crack the surrounding matrix or become loose over time. Metal objects often work better than organic materials for long-term stability.

Masking techniques protect surrounding wood surfaces during application. Quality tape and careful preparation prevent cleanup problems and surface damage. Removing masking materials at optimal cure stages prevents peeling and tear-out problems.

Multiple product combinations can create unique effects impossible with single systems. Combining different colors, viscosities, or cure times opens creative possibilities. However, compatibility testing prevents expensive failures in finished projects.

Quality Control and Common Problem Prevention

Bubble formation: The most common quality issue in decorative applications. Prevention is more effective than removal and depends on proper mixing, careful application, and controlled environmental conditions. Knowing the bubble sources makes prevention easier.


Color consistency: A challenge in multi-pour projects where seamless matching is essential. Small variations in colorants or mixing create visible lines. Preparing enough material for a full section at once avoids this issue.


Adhesion failures: Often caused by contaminated or incompatible surfaces. Even when timber looks clean, oils, waxes, or old finishes can block proper bonding. Extra surface preparation reduces the risk of costly failures.


Cure problems: Usually linked to ratio errors, contamination, or extreme conditions. Staying within product specifications prevents most issues. Keeping records of mixes and conditions helps spot problems before they spread.


Surface defects: Issues like fish-eyes, craters, or unwanted textures usually signal contamination or poor application technique. A well-prepared workspace and practice on scrap materials help avoid defects in finished projects.

Why Trust Epoxy King?

Quality Assurance

Quality Assurance

We guarantee top-quality epoxy resin products that are made to achieve the highest safety standards with our food-safe resin coating, ensuring your peace of mind.
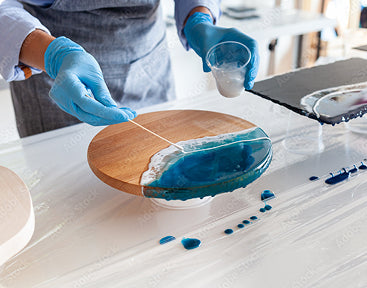
Expertise

Expertise

With years of experience in the industry, we have the knowledge and expertise to provide you with the best solutions for your food-safe projects.
Variety

Variety

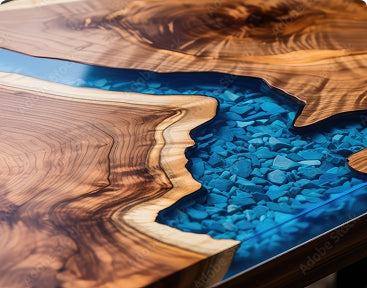
Our extensive range of epoxy resin products offers options for every need and budget, ensuring that you find the perfect fit for your project.
Customer Satisfaction

Customer Satisfaction

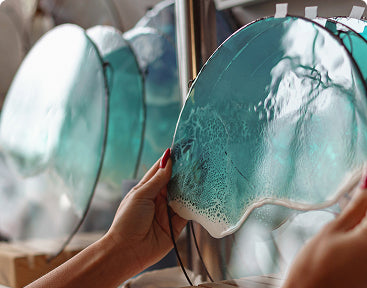
At Epoxy King, customer satisfaction is our priority. We strive to exceed your expectations with our products and service, earning your trust and loyalty.
Reliability

Reliability

When you choose Epoxy King, you can count on reliable products and dependable service every time. Trust us for all your food-safe epoxy needs and experience the difference.

Frequent Questions

Here’s a comprehensive FAQ that covers various aspects

Can these products be used in outdoor furniture applications?

Outdoor furniture presents unique challenges due to UV exposure, temperature cycling, and moisture variations. Marine-grade formulations specifically address these conditions with UV stabilizers and flexible cure profiles that accommodate wood movement. Standard indoor products may yellow, crack, or fail prematurely in exterior applications.

Proper surface preparation becomes even more critical for outdoor applications. Any contamination or poor adhesion will be amplified by weather exposure. Use degreasing agents to remove any oils or waxes, followed by light sanding to create mechanical adhesion. Allow wood to stabilize at moderate moisture content before beginning work.

Maintenance requirements differ significantly between indoor and outdoor applications. Outdoor pieces may need periodic inspection and touch-up work, especially in harsh climates. Plan for this maintenance when designing projects, ensuring that repairs can be made without complete refinishing. Clear topcoats provide additional protection but require their own maintenance schedules.

How do you achieve consistent color matching across large projects?

Color matching across large projects requires careful planning and execution. Start by mixing enough colored material for the entire project, as batch-to-batch variations in colorants can create visible differences. Store mixed material in sealed containers to prevent contamination and moisture absorption that can affect color.

Lighting conditions during mixing and application significantly affect color perception. Use consistent lighting throughout the project, preferably natural daylight or full-spectrum LED fixtures. Fluorescent lighting can shift color perception and lead to matching problems when projects are viewed under different lighting conditions.

Test patches on scrap material help verify color accuracy before committing to final applications. Wood species variations, grain patterns, and surface preparations all affect how colors appear in finished applications. These test patches also help determine optimal application techniques for consistent results across the entire project.

What's the difference between fast-cure and slow-cure formulations?

Fast-cure products offer convenience for simple applications where working time isn't critical. These formulations typically cure within minutes to hours, allowing projects to proceed quickly. However, the rapid cure limits creative possibilities and increases the risk of errors that can't be corrected during application.

Slow-cure systems provide extended working time that enables complex applications, color blending, and object embedding. Professional woodworkers often prefer these formulations for their forgiveness and superior final properties. The extended cure time allows stress relief and more complete chemical cross-linking.

Heat generation during curing differs significantly between formulations. Fast-cure products can generate substantial heat in thick sections, potentially causing cracking or incomplete cure in the center of large fills. Slow-cure systems generate less heat and cure more uniformly through thick sections, making them better for large void applications.

How do you prevent fish-eyes and other surface defects?

Fish-eyes typically result from silicone contamination on wood surfaces. Silicone from previous finishes, cleaning products, or workshop contamination creates areas where products won't wet properly. Thorough degreasing followed by alcohol wiping removes most contamination sources that cause these defects.

Surface tension problems can also create similar-looking defects. Adding small amounts of compatible surfactants can improve wetting on difficult surfaces. However, too much surfactant can cause other problems, so test on scrap material first. Some manufacturers offer specific additives for improving wetting characteristics.

Application technique affects surface quality significantly. Pouring from excessive height introduces air bubbles, while pouring too slowly can create flow marks. Finding the optimal pour height and speed for each product takes practice but dramatically improves surface quality. Using a spreader to level surfaces immediately after pouring helps eliminate many common defects.

How to achieve professional results?

Product selection determines project success more than technique in many cases. Understanding the relationship between application requirements and product characteristics helps match systems to specific needs. While premium products cost more initially, they often provide better value through superior performance and reduced failure rates.

Project planning should include product evaluation based on expected service conditions, aesthetic requirements, and working time needs. Simple utility applications may work well with basic products, while showcase pieces justify investment in premium formulations with superior clarity and durability.

Remember that successful void filling involves both technical and artistic elements. Technical knowledge ensures structural integrity and long-term performance, while artistic vision creates the visual impact that makes projects memorable. Epoxy King's product line provides the technical foundation that allows creative vision to flourish, transforming wood imperfections into design features that celebrate both natural beauty and human craftsmanship.

The combination of proper product selection, careful preparation, and skilled application techniques creates results that often exceed expectations. Whether filling small cracks in everyday projects or creating statement pieces with dramatic river effects, understanding these principles helps achieve professional-quality results that stand the test of time.